Installing PPP for Windows 95
Setting Up Networking
- Click on "Start", point to "Settings", then click on "Control Panel".
- Double-click on the "Network" icon.

- Click on the "Add..." button.
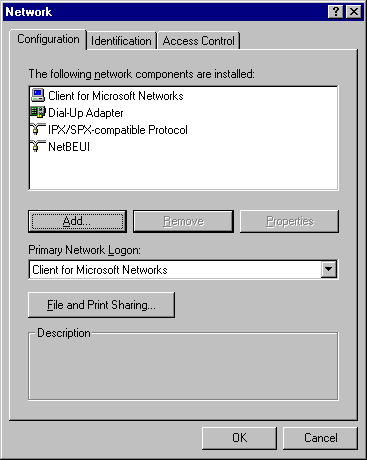
- Double-click on "Protocol".

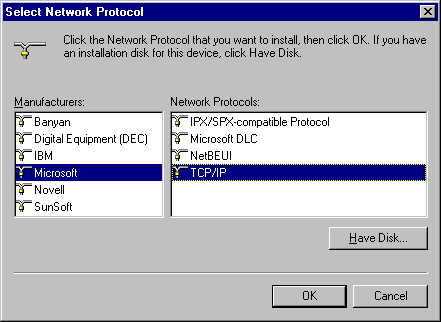
- In the left window, click on "Microsoft". In the right window, click
on "TCP/IP". Then, click on "OK".
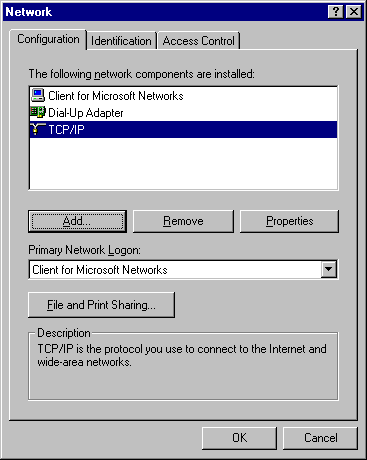
- Click on "IPX/SPX-compatible Protocol", then click on the "Remove" button. Click on "NetBEUI", then click on the "Remove" button. Now, double-click on "TCP/IP".
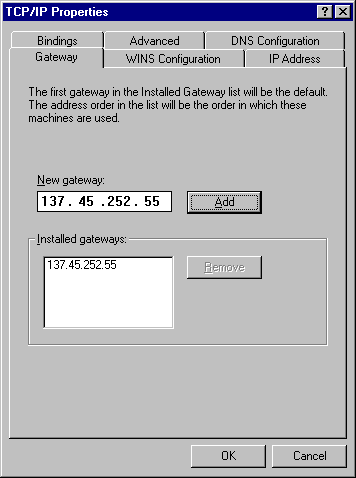
- You should now see the "TCP/IP Properties window. Click on the "Gateway" tab.
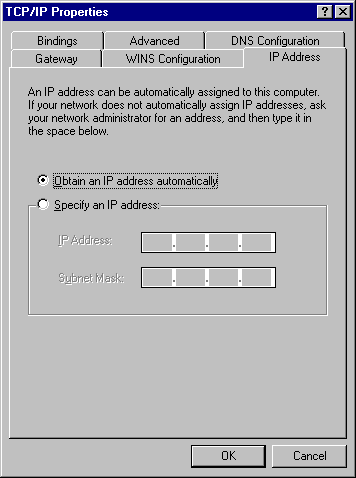
- Type "137.45.252.55" and click on "Add".
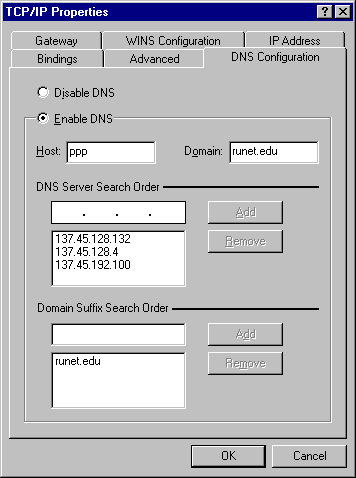
- Click on the "DNS Configuration" tab. Click in the circle beside "Enable DNS" to select this option.
- Click in the "Host" box and type "ppp".
- Click in the "Domain" box and type "runet.edu".
- Click in the "DNS Server Search Order" box.
- Type "137.45.128.132" and click "Add".
- Type "137.45.128.4" and click "Add".
- Type "137.45.192.100" and click "Add".
- Click in the "Domain Suffix Search Order" box, type "runet.edu", and click "Add".
- Click on "OK".
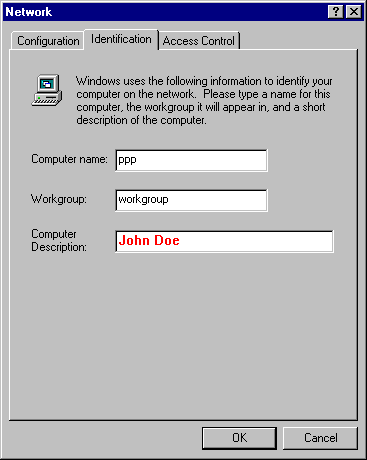
- Click on the "Identification" tab. Enter "ppp" for the "Computer name", "workgroup" for the "Workgroup", and your first nad last name for the "Computer Description".
- Click on "OK".
Windows 95 PPP Page


