
Converting a PDF to Word

Converting a PDF to Word
Solid Converter PDF allows you to convert online PDF files to an MS Word document in ten simple steps.
Step 1: Save the online PDF file to a directory
If you are viewing a PDF file in Acrobat Reader, here's how to save the file to a directory. Save the file in a place where you can retrieve it easily.
Step 2: Open Solid Converter PDF
If you have already installed Solid Converter PDF on your computer, you should have a shortcut on your desktop.

Double-click the shortcut on your desktop to open Solid Converter PDF.
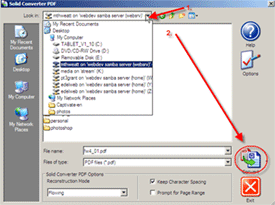
Step 3: Convert the PDF file
After you have opened the program, do the following to convert your PDF file to a Word document.
 |
|
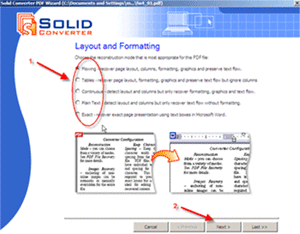
Step 4: Choose the Reconstruction mode
Depending on the type of PDF file and the purpose of the conversion, SolidConverter offers the following reconstruction modes:
 |
|
Step 5: Determine Image Recovery
When you choose to preserve the layout of a document, the images are always recovered. This dialog box allows you to remove or anchor images to text.
 |
|
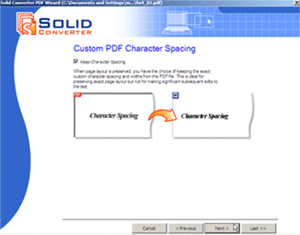
Step 6: Determine Character Spacing
When page layout is preserved, you have the option of keeping the exact custom character spacing and widths from the PDF file.
 |
|
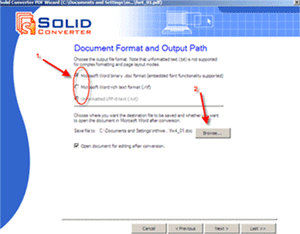
Step 7: Choose the output file format and file location
You can choose the output file format and file location by:
 |
|
Step 8: Determine page range
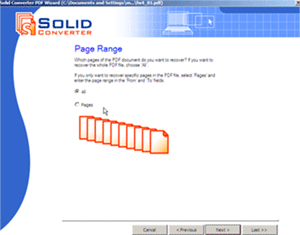 |
|
Step 9: Verify your choices
The last step in the conversion process is to confirm your choices.
 |
|
Step 10: Edit and mark-up your document in Word using your tablet
Once the conversion process has completed, MS Word will automatically open up your newly converted document. You can now type in any additions or revisions, and also mark-up the document using the pen on your tablet.
To mark-up a document with your tablet pen, simply click on the felt tip pen icon located in the Word toolbar.
![]()
Click the arrow beside the felt tip pen icon to select another pen color.
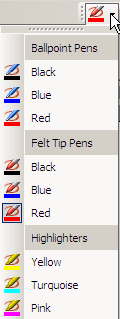
When you are finished editing your Word document, remember to save it.