
This document is part of the JEWL library, copyright © John English 2000. The JEWL library is released for public use under the terms of the GNU General Public License, and may be freely copied, distributed, used and modified under the terms of that license. Suggestions, comments, bug reports and modifications should be reported to the author <je@brighton.ac.uk>.
1. Introduction
1.1 Getting Started
1.2 Another example
1.3 An example using a dialog
2. The window type hierarchy
2.1 Support types
2.1.1 Fonts
2.1.2 Points
2.1.3 Colours
2.1.4 Angles
2.1.5 Alignments
2.1.6 Images
2.2 Specifying window sizes and positions
2.3 Using the keyboard
2.4 Message boxes and common dialogs
2.5 Playing sounds
3. Containers
3.1 Frames
3.2 Dialogs
3.3 Panels
3.4 Menus
4. Controls
4.1 Text controls
4.1.1 Buttons
4.1.2 Labels
4.1.3 Editboxes
4.2 Boolean controls
4.2.1 Menuitems
4.2.2 Checkboxes
4.2.3 Radiobuttons
4.3 Multiline controls
4.3.1 Listboxes
4.3.2 Comboboxes
4.3.3 Memos
5. Canvases
5.1 Canvas properties
5.2 Drawing operations
5.3 Modifying a drawing
5.4 Handling user interaction
6. Common dialogs
6.1 Colour dialogs
6.2 Font dialogs
6.3 File dialogs
JEWL (John English's Window Library) is a set of Ada packages aimed at novices which enables reasonably sophisticated GUI applications to be built with a minimum of effort. The packages are designed to be platform-independent, but at present the only implementation is for Microsoft Windows. The examples in this document are all based on the Windows implementation.
JEWL is not intended as a complete binding to the Windows (or any other) API; it is a deliberately simple system intended to allow novices to build GUI-based applications in Ada without tears. It hides much of the complexity involved in building GUI applications, and its use involves no "advanced" language concepts; it is intended to be accessible to programmers who are familiar with procedural programming concepts. Internally, it uses tasks, protected records, tagged types, and many other features which the user does not need to know about. The model adopted is a simplified event-loop approach which is essentially procedural and which avoids the complexities involved in using callbacks (scope issues for access to subprogram types), object-oriented approaches (overriding primitives without accidentally defining new methods that are never called) or generic controls (requiring instantiation of individual controls).
JEWL provides a number of standard GUI controls including menus, buttons, text labels, checkboxes, radio buttons, edit boxes, list boxes and combo boxes. It also provides a set of container windows to which controls can be attached; for example, a frame is a container window which appears as a standard top-level window with a title bar.
Controls can be regarded as visual representations of variables in a program. For example, an editbox appears as an editable string, and is thus a visual representation of a string variable; a checkbox is a control which can be toggled between two visible states (checked and unchecked) and is thus a visual representation of a Boolean variable.
Some controls (e.g. buttons and menu items) generate command codes when they are activated which the program can respond to in some appropriate way; others (e.g. editboxes) allow the user to interact with them but do not generate command codes. A program can wait for a command from a button or menu item and then respond to the command by reading or altering the values of other controls.
The primary JEWL package is JEWL.Windows, which is a generic package which needs to be instantiated with a type representing the command codes return by controls. To avoid the need to explicitly define a type and instantiate the package, the package JEWL.Simple_Windows is a predefined instantiation of JEWL.Windows for type Character (that is, the command code that a control returns will be a character).
To use JEWL, you need to reference the package JEWL.Windows in a with clause:
    with JEWL.Windows;
    procedure My_Program is
      ...
    end My_Program;
JEWL.Windows is a generic package which needs to be instantiated with a list of the command codes that buttons and menu items will generate. For example, if you want commands to quit the program, load a file or save a file, you could define a list of command codes like this:
type Command_Code is (Quit, Load, Save);
Now you can instantiate a version of JEWL.Windows which can generate these three command codes:
    package My_Windows is new JEWL.Windows (Command_Code);
    use My_Windows;
Next, you will need to define the main window for your program as a frame, like this:
My_Frame : Frame_Type := Frame (200, 150, "Main Window", Quit);
This creates a variable called My_Frame of type Frame_Type and initialises it to refer to a frame which is 200 pixels wide and 150 pixels high with the title "Main Window" in the caption bar at the top. When it is closed, it will generate a Quit command. It will look like this:

This window will appear on the screen as soon as it has been created, and will disappear when the program ends. The body of the program will normally contain a loop to prevent the program ending until the window is closed, like this:
    while Valid(My_Frame) loop
      ...
    end loop;
The function Valid(My_Frame) is true as long as My_Frame refers to a valid window, in other words until the window is closed. While it's open, the window can be dragged around the screen, minimised, maximised or resized in the same way as any other window. A complete program which just displays a window like the one above looks like this:
    with JEWL.Windows;
    procedure My_Program is
      type Command_Code is (Quit, Load, Save);
      package My_Windows is new JEWL.Windows (Command_Code);
      use My_Windows;
      My_Frame : Frame_Type := Frame (200, 150, "Main Window", Quit);
    begin
      while Valid(My_Frame) loop
        null;		-- do nothing, just go round the loop again
      end loop;
    end My_Program;
Alternatively, the standard instantiation JEWL.Simple_Windows can be used, which uses characters for the command codes. For example, you could use 'Q', 'L' and 'S' instead of Quit, Load and Save. This means you don't have to define the type Command_Code or instantiate JEWL.Windows:
    with JEWL.Simple_Windows;
    use  JEWL.Simple_Windows;
    procedure My_Program is
      My_Frame : Frame_Type := Frame (200, 150, "Main Window", 'Q');
    begin
      while Valid(My_Frame) loop
        null;		-- do nothing, just go round the loop again
      end loop;
    end My_Program;
Of course, this program wastes a lot of time going round and round the loop. The last parameter in the function Frame specifies a command code that will be generated when the frame is closed (in this case, 'Q'), and you can get your program to wait until a command is generated using the function Next_Command. The loop can be rewritten like this:
    loop
      case Next_Command is
        when 'Q' => ...
        when others => null;
      end case;
    end loop;
Now the program will wait for a command to be generated each time around the loop, and the case statement allows you to specify what to do for each different command. The loop no longer tests whether the frame is valid, as the command code 'Q' will be generated when the window is closed. This can be used to exit from the loop:
    when 'Q' =>
      exit;
You can also generate commands using buttons, menu items or canvases. In the case of a button, pressing it generates the command; selecting a menu item generates a command. Canvases are described later. You could define a button which generates the command code 'Q' like this:
    Quit_Button : Button_Type :=
                       Button (My_Frame, (50,10), 80, 25, "Quit", 'Q');
This defines a button attached to the frame My_Frame at position (50,10): that is, with its top left corner 50 pixels across and 10 pixels down from the top left hand corner of the client area of the frame (the inset panel within the frame). It will be 80 pixels wide by 25 pixels high, and labelled "Quit". Note that the command code 'Q' can now be generated either by closing the main window or by pressing the "Quit" button. The code for the 'Q' command can be modified to make sure that the window is closed like this:
    when 'Q' =>
      Close (My_Frame);
      exit;
The procedure Close will close the frame if it is still open (but has no effect if it is already closed).
In this example, we want to be able to generate the Load ('L') and Save ('S') commands. A simple way to do this is to add two buttons to the frame:
    Load_Button : Button_Type :=
                       Button(My_Frame, (55,20), 80, 25, "Load", 'L');
    Save_Button : Button_Type :=
                       Button(My_Frame, (55,60), 80, 25, "Save", 'S');
The first button is enclosed by frame My_Frame at position (55,20). The second is attached at (55,60), 40 pixels below the first. The buttons are both 80 pixels wide and 25 pixels high. One is labelled "Load" and generates a Load command, the other is labelled "Save" and generates a Save command. This is what it looks like when the buttons have been added to the frame:

You need to complete the case statement by supplying suitable actions in response to the Load and Save commands. For testing purposes, just displaying a message would be a good start:
    when 'L' =>
      Show_Message ("Load button pressed!");
    when 'S' =>
      Show_Message ("Save button pressed!");
Show_Message is a handy function which generates a message box containing the specified message and an "OK" button. The message box will look like this:

Here is the complete program:
    with JEWL.Simple_Windows;
    use  JEWL.Simple_Windows;
    procedure My_Program is
      My_Frame    : Frame_Type  := Frame (200, 150, "Main Window", 'Q');
      Load_Button : Button_Type :=
                        Button(My_Frame, (55,20), 80, 25, "Load", 'L');
      Save_Button : Button_Type :=
                        Button(My_Frame, (55,60), 80, 25, "Save", 'S');
    begin
      while Valid(My_Frame) loop
        case Next_Command is
          when 'Q' =>
            exit;
          when 'L' =>
            Show_Message ("Load button pressed!");
          when 'S' =>
            Show_Message ("Save button pressed!");
          when others =>
            null;
        end case;
      end loop;
    end My_Program;
By default, the GNAT compiler will generate code to create a console window, and the application window will appear on top of this. If you don't need a console window, specify the linker switch "-mwindows" when you build the program. For example, the program above can be compiled using the following command:
gnatmake my_program.adb -largs -mwindows
This section describes a slightly more complex example: a temperature converter to convert between Centigrade and Fahrenheit or vice versa. It will look like this:

This consists of a frame labelled "Converter", an editbox which currently contains the value 0, a button labelled "Convert", and a label which shows the result of the conversion (in this case "0C = 32F". There is also a menu labelled "Direction", with two menu items: "C to F" and "F to C".
The frame is 200 pixels wide by 150 high:
My_Frame : Frame_Type := Frame (200, 150, "Converter", 'Q');
The editbox is located at (10,10), is 170 pixels wide and 20 pixels high,with an initial value of zero:
Value : Editbox_Type := Editbox(My_Frame, (10,10), 170, 20, "0");
The button is located at (55,40) and is 80 pixels wide and 25 pixels wide, like this:
    Do_It : Button_Type :=
                Button (My_Frame, (55,40), 80, 25, "Convert", 'X');
The label is located at (0,75) and is 20 pixels high. We can make it occupy the full width of the parent window by specifying its width as zero. That way, if the parent window size is changed the size of the label will also be changed. Specifying the size and position of a window relative to the size of its parent window is described in section 2.2.
The label is initially blank, but we want any text displayed to be centred horizontally within it:
Result : Label_Type := Label (My_Frame, (0,75), 0, 20, "", Centre);
The menu is created like this:
    My_Menu : Menu_Type := Menu (My_Frame, "&Direction");
    C_To_F  : Menuitem_Type := Menuitem (My_Menu, "&C to F", 'C');
    F_To_C  : Menuitem_Type := Menuitem (My_Menu, "&F to C", 'F');
The menu is enclosed by the frame, and then the two menu items are attached to the menu. Each menu item specifies the command code to be generated when the item is selected. The labels for the menu and the menu items include an "&" character, which isn't displayed but instead causes the following character (e.g. the "D" in "Direction") to be underlined when it's displayed. You can select the menu with the mouse, or you can press ALT with the underlined character (ALT-D in this case) to display the menu. While the menu is visible, you can select a menu item with the mouse or by pressing ALT-C (for "C to F") or ALT-F (for "F to C").
If you don't like this visual appearance, it's easy enough to change it to suit your preferences, but the important thing now is to define the body of the program so that it does something useful. As before, we'll need a loop which terminates when the window is closed:
    loop
      case Next_Command is
        when 'Q' =>
          exit;
        when 'C' =>
          -- and so on.
      end case;
    end loop;
A few extra variables will be needed: a Boolean variable to record the direction of the conversion (C to F or F to C) which I'll call To_F, and a couple of integer variables (which I'll call C and F due to a total lack of imagination). The menu items just need to set the value of To_F:
    when 'C' =>
      To_F := True;
    when 'F' =>
      To_F := False;
When the button is pressed, we need to get the contents of the editbox and convert it from an integer to a string, and then do the calculation:
    when 'X' =>
      if To_F then
        C := Integer'Value(Get_Text(Value));
        -- convert C to Fahrenheit
      else
        F := Integer'Value(Get_Text(Value));
        -- convert F to Centigrade
      end if;
This uses the function Get_Text to get the contents of the edit box. Get_Text can be used with any text control, including editboxes and labels; you can also set the text displayed by the control using Set_Text. The conversion to Fahrenheit is done like this:
F := C * 9 / 5 + 32;
The conversion to Centigrade is the reverse of this:
C := (F - 32) * 5 / 9;
Finally, we need to use Set_Text to display the result in the label, which for a conversion to Fahrenheit is done like this:
Set_Text (Result, Integer'Image(C) & "C =" & Integer'Image(F) & "F");
The complete program looks like this:
    with JEWL.Simple_Windows;
    use  JEWL.Simple_Windows;
    procedure Converer is

      My_Frame : Frame_Type := Frame (200, 150, "Converter", 'Q');
      My_Menu  : Menu_Type  := Menu (My_Frame, "&Direction");
      C_To_F   : Menuitem_Type := Menuitem (My_Menu, "&C to F", 'C');
      F_To_C   : Menuitem_Type := Menuitem (My_Menu, "&F to C", 'F');
      Value    : Editbox_Type :=
                 Editbox (My_Frame, (10,10), 110, 20, "0");
      Do_It    : Button_Type :=
                 Button (My_Frame, (40,40), 80, 25, "Convert", 'X');
      Result   : Label_Type :=
                 Label (My_Frame, (10,75), 0, 20, "", Centre);

      To_F : Boolean := True;
      C, F : Integer;

    begin
      loop
        case Next_Command is
          when 'Q' =>
            exit;
          when 'C' =>
            To_F := True;
          when 'F' =>
            To_F := False;
          when 'X' =>
            if To_F then
              C := Integer'Value(Get_Text(Value));
              F := C * 9 / 5 + 32;
              Set_Text (Result, Integer'Image(C) & "C =" &
                                Integer'Image(F) & "F");
            else
              F := Integer'Value(Get_Text(Value));
              C := (F - 32) * 5 / 9;
              Set_Text (Result, Integer'Image(F) & "F =" &
                                Integer'Image(C) & "C");
            end if;
        end case;
      end loop;
    end Converter;
Of course, there are many ways this could be improved; there is no visible indication whether a Centigrade-to-Fahrenheit or a Fahrenheit-to-Centigrade conversion will be performed when the button is pressed, and there is no exception handling to cope with situations where non-integer input is entered into the edit box. Such improvements are left as exercises for the reader... :-)
This section gives an example which is an extension of the one given in the previous section. Instead of converting temperatures, it converts currencies using an exchange rate which can be specified in a pop-up dialog. Pressing a "Set Rate" button activates the dialog, which looks like this:

Dialog boxes are used for modal dialogs, where the user is forced to provide some input before it is possible to proceed. A dialog window is similar to a frame window, except that dialogs cannot be resized, minimised or maximised, and they cannot have menus. A dialog also disables all other windows belonging to the same application while it is visible, so dialogs cannot be ignored. The only ways to dismiss a dialog and resume normal processing are to press a button within the dialog window, or to cancel the dialog by using the "close" button in the upper right corner.
In this case we want a dialog labelled "Conversion Rate" which we'll arrange to generate the character 'Q' if it is closed:
    Convert  : Dialog_Type :=
               Dialog (200, 100, "Conversion Rate", 'Q');
Attached to this are a label, and edit box and two buttons. The OK button will generate the character 'Y', and the Cancel button will generate the character 'Q' (the same as if the dialog window is closed directly):
    C_Label  : Label_Type :=
               Label (Convert, (10,10), 40, 25, "Rate:", Right);
    C_Edit   : Editbox_Type :=
               EditBox (Convert, (60,10), 100, 25, "1.00");
    C_OK     : Button_Type :=
               Button (Convert, (10,45) , 80, 25, "OK", 'Y');
    C_Cancel : Button_Type :=
               Button (Convert, (100,45) , 80, 25, "Cancel", 'Q');
The "Set Rate" button can be defined like this:
    Set_Rate : Button_Type :=
               Button (My_Frame, (140,40), 80, 25, "Set Rate", 'R');
When the button is pressed, we make the dialog appear by calling Execute(Convert), which will return the code for the button which was pressed to close the dialog. If the result is 'Y', we want to get the value from the edit box and put it in a variable called Rate:
    when 'R' =>
      if Execute(Convert) = 'Y' then
        Rate := Float'Value(Get_Text(C_Edit));
      end if;
Note that if the Set_Rate button is pressed again, the value that was entered into the edit box will still be there unless it has been explicitly altered by the program.
The complete program looks like this:
  with JEWL.Simple_Windows;
  use  JEWL.Simple_Windows;
  procedure Currency_Converter is
    My_Frame : Frame_Type := Frame (400, 150, "Currency Converter", 'Q');
    Value    : Editbox_Type :=
               Editbox (My_Frame, (10,10), 110, 20, "0");
    Do_It    : Button_Type :=
               Button (My_Frame, (40,40), 80, 25, "Convert", 'X');
    Set_Rate : Button_Type :=
               Button (My_Frame, (140,40), 80, 25, "Set Rate", 'R');
    Result   : Label_Type :=
               Label (My_Frame, (10,75), 0, 20, "", Centre);

    Convert  : Dialog_Type :=
               Dialog (200, 100, "Conversion Rate", 'Q');
    C_Label  : Label_Type :=
               Label (Convert, (10,10), 40, 25, "Rate:", Right);
    C_Edit   : Editbox_Type :=
               EditBox (Convert, (60,10), 100, 25, "1.00");
    C_OK     : Button_Type :=
               Button (Convert, (10,45) , 80, 25, "OK", 'Y');
    C_Cancel : Button_Type :=
               Button (Convert, (100,45) , 80, 25, "Cancel", 'Q');

    Rate : Float := 1.00;
    Val  : Float := 0.00;

  begin
    loop
      case Next_Command is

        when 'Q' =>
          exit;

        when 'R' =>
          if Execute(Convert) = 'Y' then
            Rate := Float'Value(Get_Text(C_Edit));
          end if;

        when 'X' =>
          Val := Float(Integer'Value(Get_Text(Value)));
          Set_Text (Result, Integer'Image(Integer(Val*Rate)));

        when others =>
          null;

      end case;
    end loop;
  end Currency_Converter;
Again, improvements are left as an exercise for the reader...
Important noteDue to the way that dialogs are currently implemented, you should not declare Dialog_Type objects in a library-level package specification because this will prevent the program from terminating. You should only ever declare them inside procedures or package bodies. If necessary, you can declare a function in the package specification which will return a copy of a dialog declared inside the package body. |
The available types of window are arranged in a class hierarchy, like this:
    Window_Type
      |
      +--- Container_Type (3)
      |      |
      |      +--- Frame_Type (3.1)
      |      |
      |      +--- Dialog_Type (3.2)
      |      |
      |      +--- Panel_Type (3.3)
      |      |
      |      +--- Menu_Type (3.4)
      |
      +--- Control_Type
             |
             +--- Text_Control_Type (4.1)
             |      |
             |      +--- Button_Type (4.1.1)
             |      |
             |      +--- Label_Type (4.1.2)
             |      |
             |      +--- Editbox_Type (4.1.3)
             |      |
             |      +--- Boolean_Control_Type (4.2)
             |             |
             |             +--- Menuitem_Type (4.2.1)
             |             |
             |             +--- Checkbox_Type (4.2.2)
             |             |
             |             +--- Radiobutton_Type (4.2.3)
             |
             +--- Multiline_Type (4.3)
             |      |
             |      +--- Listbox_Type (4.3.1)
             |      |
             |      +--- Combobox_Type (4.3.2)
             |      |
             |      +--- Memo_Type (4.3.3)
             |
             +--- Canvas_Type (5)
Each level in the hierarchy defines a set of operations which can be used with any class descended from it in the hierarchy. For example, a button (Button_Type) can be used with any operation which applies to Window_Type, Control_Type, Text_Control_Type or Button_Type objects.
The operations defined for Window_Type can be applied to any window at all. These are as follows:
Note that in descriptions of operations like those above, the parameter names shown are the names that can be used in named-parameter notation when calling the operations:
    Show (W, True);                       -- make window W visible
    Show (Window => W, Visible => True);  -- the same thing
    Show (W, Visible => True);            -- the same thing again

    Set_Size (W, Width=>100);             -- set only the width of W
    Set_Size (W, Height=>100);            -- set only the height of W
Also, the name of each operation in its description is hyperlinked to its declaration in the HTML version of the corresponding package specification, so that you can view the formal specification of any operation by clicking on the link in its description.
The intermediate types in the hierarchy (Window_Type, Container_Type, Control_Type, Text_Control_Type, Boolean_Control_Type and Multiline_Type) are abstract types which can't be used directly. All other types provide constructor functions to create windows of the appropriate type; for example, the Frame_Type constructor is a function called Frame, the Button_Type constructor is a function called Button, and so on.
The basic categories of window are as follows:
These are each described in more detail below.
Additional support types are used within JEWL to represent fonts (Font_Type), points (Point_Type), colours (Colour_Type) and angles (Angle_Type). This section describes these types and the operations provided to handle them.
A font describes the typeface used to display text, and is defined as a type called Font_Type. The following constructor function must be used to create a font:
There are two global fonts:
If no fonts are specified, top-level windows will use Default_Font and all other windows will use the same font as their parents.
A point describes an (x,y) coordinate within a window. The coordinate system is measured starting at the origin (0,0) in the top left corner of the window, with the x coordinate giving the horizontal distance from the origin and the y coordinate giving the vertical distance from the origin, where the distances are measured in pixels. A point is an object of type Point_Type, which is just a record with two integer components called X and Y. The simplest way to construct a Point_Type object is to enclose two integers in parentheses, using named notation if desired:
    (50,20)             -- a point 50 pixels across and 20 down
    (X => 50, Y => 20)  -- the same thing
The following operations are provided for points:
A colour is represented as a triplet of values in the range 0 to 255 (as defined by the subtype Colour_Range) representing an RGB colour. A colour is an object of type Colour_Type, which is just a record containing three values called Red, Green and Blue. These represent the intensities of the individual hues making up the colour. There are several predefined constants for common colours: Black, White, Red, Green, Blue, Gray, Yellow, Cyan and Magenta. The simplest way to construct a Colour_Type object is to enclose three values in parentheses, using named notation if desired:
    (255,255,0)			-- yellow (full intensity red and green together)
    (Red => 255, Green => 255, Blue => 0)  -- the same thing
There are two operations provided for colours:
For the benefit of speakers of American English, the names Color_Type and Color_Range are provided as renamings of Colour_Type and Colour_Range respectively.
Angles are represented by values of type Angle_Type, which is a modular type with values in the range 0 to 359 representing an angle in degrees. This gives a maximum angular resolution of one degree, which should be adequate given the limitations of most display screens. Being a modular type, you can perform arithmetic on Angle_Type values and the result will "wrap around" to remain within the permitted range (although any value directly assigned to an Angle_Type variable must already be in the correct range), so that adding 270 degrees to 180 degrees will give a result of 90 degrees rather than 450 degrees.
There are four constants of type Angle_Type provided for the sake of convenience: North (0), South (180), East (90) and West (270).
The type Alignment_Type is sometimes used for specifying the horizontal alignment of text in a control. There are three possible values: Left, Centre, and Right. In all cases where an alignment can be specified, it is optional. The default value when an alignment is omitted is Left
For the benefit of speakers of American English, the name Center is provided as a renaming of Centre.
The type Image_Type is a private type which can hold a bitmap image loaded from a file, which can be displayed on a canvas. The operations provided for use with images are as follows:
Apart from frames and dialogs, all other windows are contained inside other windows. The origin of the top-left corner of a window enclosed in another window (the parent window) is a Point_Type value. This specifies an offset from the top-left corner of the parent window when the coordinates are non-negative. Negative coordinates specify an offset from the bottom or right of the parent window; for example, an origin of (–20,5) means an origin located 20 pixels in from the right-hand edge of the parent window and 5 pixels down from the top edge.
Heights and widths can also be specified relative to the size of the parent window. Positive values are used for absolute heights and widths, whereas zero or negative values are taken to be relative to the height or width of the parent window. Zero means the same height or width as the parent window, and a negative value –n means n pixels less than the corresponding dimension of the parent window.
Coordinates which are relative to the parent window are adjusted if the size of the parent window changes. For example, a window with an origin of (5,–50) and a width of –10 will be adjusted so that if the size of the parent window is changed, the enclosed window will be adjusted so that it is still positioned 5 pixels from the left of the parent window's left edge, 50 pixels up from the parent window's bottom edge, and the width will be 10 pixels less than the width of the parent window.
The following functions are provided to give the dimensions of the display screen:
The keyboard can be used instead of (or as well as) the mouse for interacting with controls. Controls can be activated by clicking on them with the mouse, but equivalent keyboard shortcuts can also be used.
At any given moment, a particular control will be the "active" control and will be visibly highlighted. The space bar will activate the current control if it is a button or checkbox. The TAB key can be used to move to the next control (where the ordering is defined by the order in which controls are created in the program) and Shift-TAB can be used to move to the previous control. The arrow keys can be used to move to the next radiobutton in a group of radiobuttons, or to move between items in a menu.
In the case of buttons, checkboxes, radiobuttons and menu items, the text of the control can include the character "&". This is not displayed, but instead causes the next character to be displayed underlined (e.g. "&Cancel" will be displayed as "Cancel"). Pressing ALT and the selected character (e.g. ALT-C in the previous example) will activate the control.
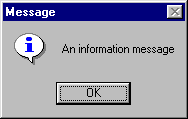
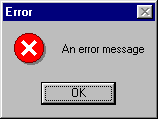
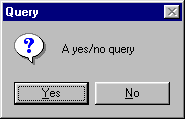
A message box is a dialog which can be used to notify the user of an error or other information, or to ask a yes/no question. There are three operations which display message boxes:
|
|
|
|
|
|
JEWL also provides access to a selection of common dialogs which are available as off-the-shelf components. These provide the following types of interaction:
From a programming point of view, these have been designed to be used in a similar way to handbuilt dialogs as described below, but they are not part of the standard hierarchy of window types. Their use is described in more detail at the end of this document.
A utility procedure Play_Sound is also provided to allow sounds stored as wave (.WAV) files to be played. Sounds are played asynchronously (i.e. the program does not wait for the sound to finish before continuing). This procedure is used as follows:
If the file specified by the string Sound does not specify a valid sound file, the procedure does nothing.
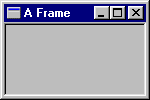
Containers are windows which can contain other windows. There are four types of containers:
 3.1
Frames
3.1
FramesA frame (type Frame_Type) is a top-level window intended for use as the main window of an application. A frame is a container that other windows (controls etc.) can be attached to. Subwindows of a frame are inserted into the client area of the frame (the sunken area that it encloses) and all subwindow measurements are taken relative to the boundaries of the client area.
The operations that apply to frames are as follows, in addition to those operations that apply to all windows (Show, Hide, Focus, Visible, Get_Origin, Get_Width, Get_Height, Set_Origin, Set_Size, Get_Font and Set_Font):
 3.2
Dialogs
3.2
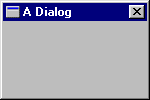
DialogsA dialog (type Dialog_Type) is a top-level window intended for use in modal interactions with the user. Dialogs are not normally visible except when they are being executed. Executing a dialog makes the dialog window visible in the centre of the screen and disables all other windows belonging to the application until a command is generated, either by closing the dialog window or by generating a command from a control enclosed by the dialog. Dialogs can be moved but unlike frames they cannot be resized, minimised or maximised.
The operations that apply to dialogs are as follows, in addition to those operations that apply to all windows (Show, Hide, Focus, Visible, Get_Origin, Get_Width, Get_Height, Set_Origin, Set_Size, Get_Font and Set_Font):
 3.3
Panels
3.3
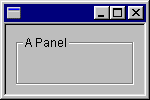
PanelsA panel (type Panel_Type) is a container intended for grouping controls together. A panel is not a top-level window and therefore must be enclosed by another container.
The only operation that applies to panels is the constructor function, in addition to those operations that apply to all windows (Show, Hide, Focus, Visible, Get_Origin, Get_Width, Get_Height, Set_Origin, Set_Size, Get_Font and Set_Font):
 3.4
Menus
3.4
MenusMenus (type Menu_Type) are containers for menu items. Menus can only be attached to frames or to other menus. A menu which is attached to a frame will appear on a menu bar above the parent's client area, and a menu attached to a menu will appear as a menu item with an arrowhead next to it, which will display a submenu when it is selected. The font used for displaying menus cannot be changed. Any attempt to change the font will be ignored, and the font will be reported as being the same as the parent frame's font. Similarly, attempts to hide a menu will be ignored.
The only operation that applies to menus is the constructor function, in addition to those operations that apply to all windows (Show, Hide, Focus, Visible, Get_Origin, Get_Width, Get_Height, Set_Origin, Set_Size, Get_Font and Set_Font):
Controls are windows which provide for user interaction. They can be regarded as a visual representation of an internal variable whose value can be accessed and altered by the program. In most cases, the user of the program can also interact with controls to change their values. Some controls (buttons, menu items and canvases) can also generate command codes which will be returned as the result of the Next_Command function (described in the section on frames, above).
Several types of controls are provided by JEWL:
All controls support the following operations, in addition to those operations that apply to all windows (Show, Hide, Focus, Visible, Get_Origin, Get_Width, Get_Height, Set_Origin, Set_Size, Get_Font and Set_Font):
Text controls contain a single string of text which can be inspected and altered by the program. The types of text control available are as follows:
Text controls support the following operations, in addition to those operations that apply to all controls (Show, Hide, Focus, Visible, Get_Origin, Get_Width, Get_Height, Set_Origin, Set_Size, Get_Font, Set_Font, Enable, Disable and Enabled):
 4.1.1
Buttons
4.1.1
ButtonsA button (type Button_Type) is a control that generates a command when it is pressed.
The only operation specific to buttons is the constructor function, in addition to those operations that apply to all text controls (Show, Hide, Focus, Visible, Get_Origin, Get_Width, Get_Height, Set_Origin, Set_Size, Get_Font, Set_Font, Enable, Disable, Enabled, Get_Length, Get_Text and Set_Text):
 4.1.2
Labels
4.1.2
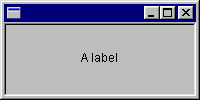
LabelsA label (type Label_Type) is a static control that is not interactive. Labels cannot be enabled or disabled, and any attempt to enable or disable a label is ignored.
The only operation specific to labels is the constructor function, in addition to those operations that apply to all text controls (Show, Hide, Focus, Visible, Get_Origin, Get_Width, Get_Height, Set_Origin, Set_Size, Get_Font, Set_Font, Enable, Disable, Enabled, Get_Length, Get_Text and Set_Text):
 4.1.3
Editboxes
4.1.3
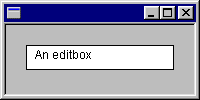
EditboxesAn editbox (type Editbox_Type) is a control that allows you to interactively edit a single line of text. If the length of the line exceeds the width of the visible box, the text will scroll automatically as you move the cursor along it.
The operations specific to editboxes are as follows, in addition to those operations that apply to all text controls (Show, Hide, Focus, Visible, Get_Origin, Get_Width, Get_Height, Set_Origin, Set_Size, Get_Font, Set_Font, Enable, Disable, Enabled, Get_Length, Get_Text and Set_Text):
Boolean controls are a subclass of text controls which also contain a Boolean state which can be inspected and altered by the program. The types of Boolean controls available are as follows:
Boolean controls support two extra operations, in addition to those operations that apply to all text controls (Show, Hide, Focus, Visible, Get_Origin, Get_Width, Get_Height, Set_Origin, Set_Size, Get_Font, Set_Font, Enable, Disable, Enabled, Get_Length, Get_Text and Set_Text):
 4.2.1
Menu items
4.2.1
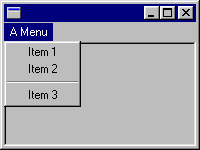
Menu itemsA menu item (type Menuitem_Type) is a control which can only be attached to a menu. As with menus, you cannot hide or change the font of a menu item, and the font will always be reported as being the same as the parent frame's font. Menu items can be checked or unchecked; when they are checked, a checkmark is displayed to the left of the text.
The only operations on menu items are as follows, in addition to those operations that apply to all Boolean text controls (Show, Hide, Focus, Visible, Get_Origin, Get_Width, Get_Height, Set_Origin, Set_Size, Get_Font, Set_Font, Enable, Disable, Enabled, Get_Length, Get_Text, Set_Text, Get_State and Set_State):
 4.2.2
Checkboxes
4.2.2
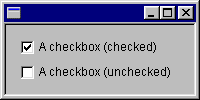
CheckboxesA checkbox (type Checkbox_Type) is a Boolean text control comprising a text label to the right of a box which can be checked or unchecked interactively.
The only operation specific to checkboxes is the constructor function, in addition to those operations that apply to all Boolean text controls (Show, Hide, Focus, Visible, Get_Origin, Get_Width, Get_Height, Set_Origin, Set_Size, Get_Font, Set_Font, Enable, Disable, Enabled, Get_Length, Get_Text, Set_Text, Get_State and Set_State):
 4.2.3
Radiobuttons
4.2.3
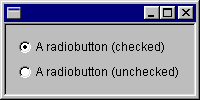
RadiobuttonsA radiobutton (type Radiobutton_Type) is a Boolean text control comprising a text label to the right of a box which can be checked or unchecked interactively. Unlike a checkbox, a radiobutton's state is related to the state of any other radiobuttons belonging to the same group. A group of radiobuttons is created by adding consecutive radiobuttons to the same container window. They must be added consecutively, because adding any other type of control to a window will end the group.
Selecting an unchecked radiobutton will set it to the checked state, and at the same time will uncheck any checked radiobutton enclosed by the same container. Selecting a checked radiobutton has no effect; the only way to uncheck a radiobutton is by checking another one belonging to the same group (or by calling Set_State).
The only operation specific to radiobuttons is the constructor function, in addition to those operations that apply to all Boolean text controls (Show, Hide, Focus, Visible, Get_Origin, Get_Width, Get_Height, Set_Origin, Set_Size, Get_Font, Set_Font, Enable, Disable, Enabled, Get_Length, Get_Text, Set_Text, Get_State and Set_State):
A multiline control is similar to a text control except that it can contain multiple lines of text, one of which can be selected as the current line. Lines can be referenced using a line number, where line 1 is the first line. For convenience, you can also access the current line as line 0, assuming that a line has been selected as the current line. Specifying the number of a non-existent line will raise a Constraint_Error exception.
The types of multiline control available are as follows:
Multiline controls support the following operations, in addition to those operations that apply to all controls (Show, Hide, Focus, Visible, Get_Origin, Get_Width, Get_Height, Set_Origin, Set_Size, Get_Font, Set_Font, Enable, Disable and Enabled):
Individual types of multiline control interpret these operations in slightly different ways, as described below.
 4.3.1
Listboxes
4.3.1
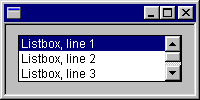
ListboxesA listbox (type Listbox_Type) is a list of text lines which will display a vertical scroll bar if the number of lines exceeds the space available. You can select a line by clicking on it with the mouse or by calling Select_Line, in which case it becomes the control's current line and is highlighted on the display.
The only operation specific to listboxes is the constructor function, in addition to those operations that apply to all multiline controls (Show, Hide, Focus, Visible, Get_Origin, Get_Width, Get_Height, Set_Origin, Set_Size, Get_Font, Set_Font, Enable, Disable, Enabled, Get_Count, Get_Line, Get_Length, Get_Text, Set_Text, Select_Line, Append_Line, Insert_Line, Delete_Line and Delete_All):
 4.3.2
Comboboxes
4.3.2
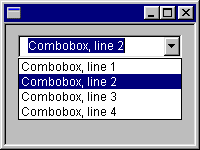
ComboboxesA combobox (type Combobox_Type) is a combination of an editbox and a listbox. The listbox is not normally visible; it can be pulled down in a similar way to a menu by clicking on the button at the right of the editbox. A line can be selected as the current line by pulling down the listbox and selecting a line, or by calling Select_Line. The editbox always contains the text of the current line for the control, and its contents can always be accessed using 0 as the line number. If text is entered directly into the editbox which does not match any of the values in the listbox, it is treated as if there is no current line (Get_Line will return zero).
The only operation specific to comboboxes is the constructor function, in addition to those operations that apply to all multiline controls (Show, Hide, Focus, Visible, Get_Origin, Get_Width, Get_Height, Set_Origin, Set_Size, Get_Font, Set_Font, Enable, Disable, Enabled, Get_Count, Get_Line, Get_Length, Get_Text, Set_Text, Select_Line, Append_Line, Insert_Line, Delete_Line and Delete_All):
 4.3.3
Memos
4.3.3
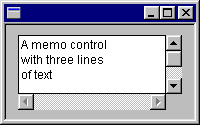
MemosA memo (type Memo_Type) is a general-purpose text editor. Unlike other multiline controls, the cursor can be positioned at an individual character rather than selecting an entire line, and a block of text can be selected which spans multiple lines (in which case the current position is taken to be the beginning of the selection).
Lines in a memo are handled slightly differently to other multiline controls. The cursor is initially positioned at the start of the memo, which initially contains no lines. As soon as any text is entered into this line, it becomes the first line of the memo. Pressing the Return key ends the line and moves on to the next line, but this also isn't counted as a line while it doesn't contain any text. If the last line of a memo is blank it is not treated as a line, but only as a placemarker for where the next line will go. Selecting a line using Select_Line will move the cursor to the start of the selected line. The current line will be reported as 0 if the cursor is positioned on a blank line at the end of a memo.
The operations specific to memos are as follows, in addition to those operations that apply to all multiline controls (Show, Hide, Focus, Visible, Get_Origin, Get_Width, Get_Height, Set_Origin, Set_Size, Get_Font, Set_Font, Enable, Disable, Enabled, Get_Count, Get_Line, Get_Length, Get_Text, Set_Text, Select_Line, Append_Line, Insert_Line, Delete_Line and Delete_All):
 5.
Canvases
5.
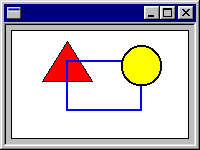
CanvasesA canvas (type Canvas_Type) is a general-purpose drawing surface which can optionally generate a command code when the mouse button is pressed within its boundaries or when a key is pressed. You can draw lines, rectangles, ellipses and circles, general polygons and text in a mixture of colours, sizes and fonts. Canvases support the operations that apply to all windows (Show, Hide, Focus, Visible, Get_Origin, Get_Width, Get_Height, Set_Origin, Set_Size, Get_Font and Set_Font) in addition to the ones described below.
There are three constructor functions to construct canvases which respond to no events, mouse events only, or both mouse and keyboard events, as follows:
Note that a command code for the mouse button must always be specified in addition to the command code for key presses if the canvas is required to respond to the keyboard.
The background of the canvas is white by default, but you can select a different colour at any time. A canvas also has a number of tools which are used when you are drawing on it:
You can change any of these tools at any time, and you can use different pens, fonts and fill colours at different times. Unlike other windows, changing these tools will not affect objects that have already been drawn using a different pen, font or fill colour; only objects that are drawn after the properties have changed are affected. Closed shapes use both the pen and fill colour; the pen is used to draw the perimeter of the shape, and the fill colour (if any) is used to fill the interior of the shape
These are the operations used to change the drawing tools:
For the benefit of speakers of American English, the name Set_Color is provided as a renaming of Set_Colour.
Canvases provide a range of drawing operations. A sequence of drawing operations can be interspersed with changes of drawing tools. These are the drawing operations available:
Note that when text is drawn using Draw_Text, the rectangle within which it is drawn is not erased; the text is drawn directly on top of any existing items on the canvas. If you want to draw text on a blank background, you will need to provide this by drawing a blank rectangle before drawing the text.
When an object is drawn it normally becomes a permanent part of the canvas. If you want to modify an existing drawing, you can erase the entire canvas and redraw everything. A less drastic solution is to save a snapshot of the canvas state and restore it to that state later, thus deleting everything drawn since the snapshot was saved.
The relevant operations are as follows:
Note that only one snapshot can be saved; using Save a second time will destroy the previous snapshot. However, you can use Restore to go back to the same saved state as many times as you wish. Also, note that the saved snapshot will be destroyed if you call Erase (since you can't revert to a previous state of a drawing after the drawing has been erased).
Save and Restore can be used where a drawing needs to be modified, as for example in displaying an analogue clock. An analogue clock can be implemented by drawing the clockface using Save to save the state of the drawing, and then drawing the hands. Calling Restore will then revert the drawing to the point where the clockface has been drawn but the hands haven't, so the hands can then be drawn in a different position. Implementing a clock like this just involves calling Restore and redrawing the hands once a minute (or once a second if a second hand is used).
A canvas can generate a command when the mouse button is pressed within its boundaries. This can be used to implement interactive drawing programs. There are several operations available to let the program track the mouse while the button is down:
These functions can be used in conjunction with Save and Restore (see above) to track the mouse visually while the mouse button is down. For example, by using Save to store the state of the drawing when the mouse button is pressed, the saved state can be restored whenever the mouse is moved and a line can be drawn between the start point and end point. The next time the mouse is moved, the saved state will be restored again (thus deleting the line) and a new line can be drawn:
    when Mouse_Pressed =>
      Save (Canvas);
      while Mouse_Down (Canvas) loop
        if Mouse_Moved (Canvas) then
          Restore (Canvas);
          Draw_Line (Canvas, Start_Point(Canvas), End_Point(Canvas));
        end if;
      end loop;
      Restore (Canvas);
This gives a "rubber-banding" effect, where the mouse is followed around by a line connecting the current position to the original point where the mouse button was pressed. If Restore is called at the end of the loop as shown above, the line will disappear when the mouse button is released. If not, the line will remain as a permanent part of the drawing, and the next time the mouse button is pressed the saved snapshot will be overwritten with a new snapshot so that the line can no longer be deleted by calling Restore.
The following function can be used to test for key presses:
The dialogs described here are provided as standard off-the-shelf dialog boxes for common interactions in much the same way as message boxes are provided for displaying simple messages. They are as follows:
These are arranged in a type hierarchy as follows:
    Common_Dialog_Type
      |
      +--- Colour_Dialog_Type (6.1)
      |
      +--- Font_Dialog_Type (6.2)
      |
      +--- File_Dialog_Type (6.3)
             |
             +--- Open_Dialog_Type
             |
             +--- Save_Dialog_Type
All common dialogs provide the following operation:
They also provide dialog-specific operations to get and set the values stored in the dialog. Typically the initial values will be set before the dialog is executed, and the program will get the new value if Execute returned True. The dialogs will also retain their values between calls to Execute if they are not reset.
Each of the different dialog types are described in more detail below.
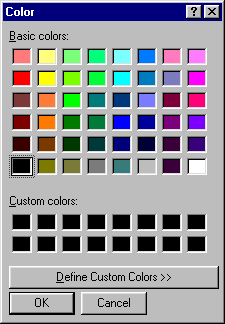
A colour dialog (type Colour_Dialog_Type) provides a palette of standard colours that you can choose from, or you can add your own custom colours to the palette. A colour dialog looks like this:
The operations that apply to colour dialogs are as follows, in addition to the Execute operation described above:
For the benefit of speakers of American English, the names Color_Dialog_Type, Color_Dialog, Set_Color and Get_Color are provided as renamings of Colour_Dialog_Type, Colour_Dialog, Set_Colour and Get_Colour respectively.
A font dialog (type Font_Dialog_Type) lets you select a font by selecting the desired name, size and style from a list of available fonts. A font dialog looks like this:
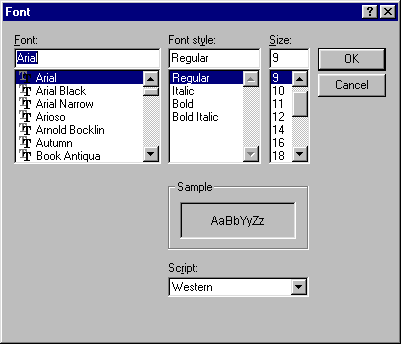
The operations that apply to font dialogs are as follows, in addition to the Execute operation described above:
File dialogs allow you to select a filename to be opened for input or output. There are two types of file dialog available:
Both types of dialog look like this:
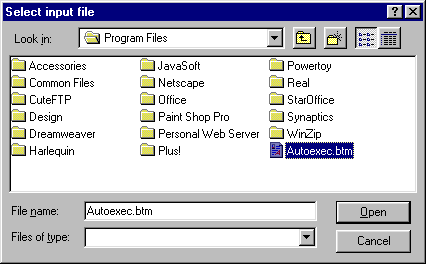
This is an Open dialog; the Save dialog looks exactly the same except that the button labelled "Open" is replaced by a button labelled "Save". They are functionally identical except for the types of file that can be selected. In an Open dialog, only existing files can be selected; in a Save dialog, new names can be typed in directly.
The operations that apply to file dialogs are as follows, in addition to the Execute operation described above: